Configure your WHMCS store to accept Bayarcash payments
Before proceeding with the setup, ensure you have:
1) A registered Bayarcash merchant account (Sign up if you haven’t)
2) Verified and activated payment methods in your Bayarcash portal
3) Access to your WHMCS’s payment settings
Installation Process
Follow these steps to integrate Bayarcash payments into your WHMCS store:
- Download the Bayarcash module package from the official WHMCS marketplace here.
- When extracting the ZIP file, verify that there is a “modules” folder containing both “addons” and “gateways” subfolders inside it.
- Upload folder modules to WHMCS installation directory.
- Login to your WHMCS admin section, navigate to System Settings->Payment Gateways, find Bayarcash within All Payment Gateways and initiate activation.
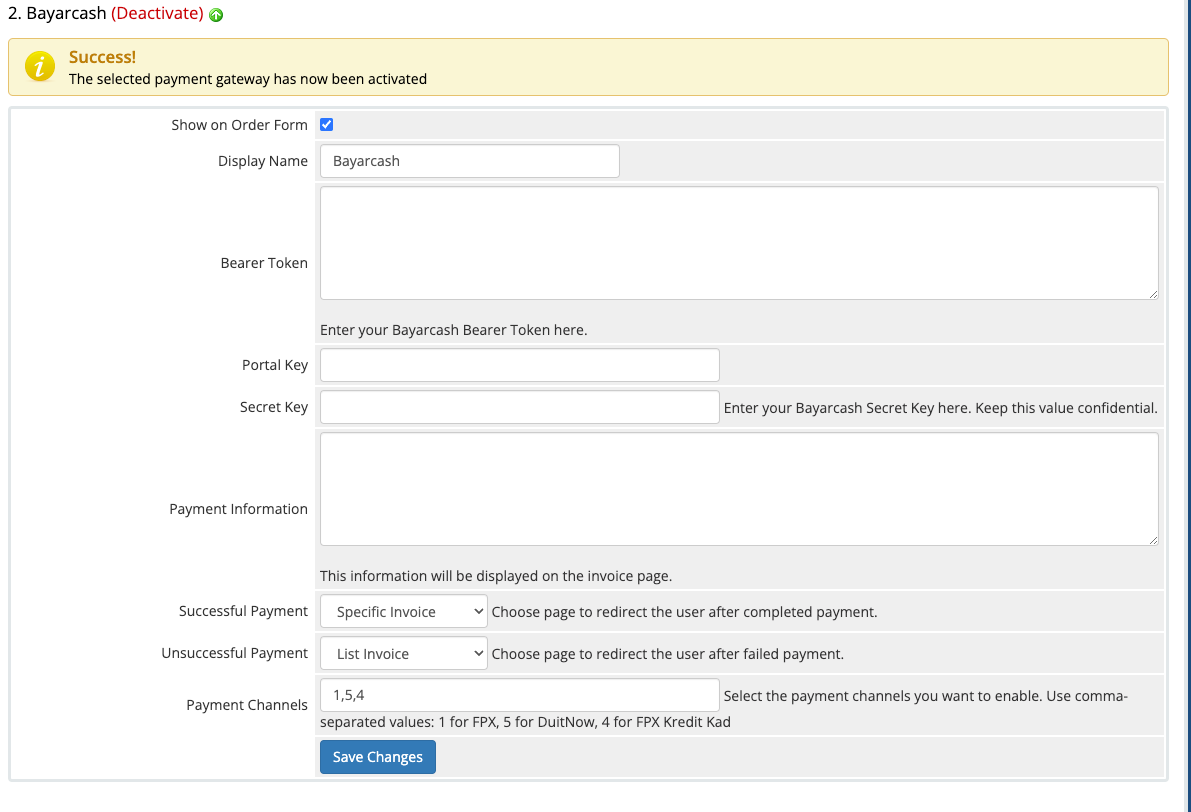
Payment Gateway Configuration
Make sure you’re on the right page by confirming you see the Bayarcash configuration panel, which contains all payment setup options.
Access multiple payment options with Bayarcash’s channels:

You’ll need to enter your Personal Access Token (PAT), Portal Key and API Secret Key from your Bayarcash Merchant Console.

Payment Gateway Fee Configuration
During installation, confirm that both the “addons” and “gateways” folders are successfully uploaded together.

- Go to System Settings > Addon Modules in your WHMCS admin panel
- Find “Bayarcash Gateway Fees” and click “Configure”
- Under “Access Control”, select “Full Administrator” role to grant access
- Save your changes and go to Menu “Addons > Bayarcash Gateway Fees”


Below you’ll find an example showing how gateway processing fees appear on customer invoices.

Great job! Bayarcash is now fully integrated with your WHMCS store. ✨